I gave my TV auto-popping security cameras (And nearly got my TV IP-banned)
As an affiliate in various programs and Amazon Associate, Smart Home Labo earns from qualifying purchases. This site contains affiliate links.
Look, I am a simple, unrefined couch creature. When I am three episodes deep into a weekend binge and someone walks up to my house, the absolute last thing I want to do is dig through couch cushions for my phone or—worse—stand up to look out the window.
My ultimate smart home dream? A sci-fi command center setup: the doorbell rings, and a sleek little Picture-in-Picture (PiP) video stream quietly floats into the corner of my TV screen, shows me who’s outside, and vanishes automatically—all while my movie keeps playing underneath without pausing.
That exact laziness-fueled fantasy is why I installed QuickBars.
As a nice secondary perk, the app also lets you hijack physical remote buttons. On my remote, the dead Netflix button (a corporate billboard for a service I don’t even pay for) now toggles room lights and launches apps. But while button remapping is a handy sidekick, automated hands-free camera pop-ups are the absolute superhero here.
It took me about a day of active configuration, spread over roughly two weeks of accidentally DDoS-hammering my own setup, getting locked out by my own server, and coming back to it in defeat. Let’s get your TV upgraded—and save you from my exact self-inflicted mistakes.
📺 What exactly is QuickBars?
Section titled “📺 What exactly is QuickBars?”QuickBars is a free Android TV app (with a few limits on the free tier) that connects directly to Home Assistant. Its main trick is drawing lightweight overlays on top of whatever app is currently running on your TV screen.
Instead of interrupting your movie, Home Assistant can send a background signal to instantly float a live PiP camera stream over your show, or pop up an interactive control bar with buttons for your lights, AC, and smart devices. And yes, as a bonus, it intercepts physical remote button presses so you can reassign them to smart home actions.
One important heads-up before you start downloading: the app interface is entirely in English, with no other language options at the moment. If you’re setting this up for a household in Japan or for non-English speakers, treat this as a “you configure it once behind the scenes, they just enjoy the smart TV” project.
🧰 What you’ll need
Section titled “🧰 What you’ll need”- Android TV, Google TV (Amazon - Rakuten) or maybe a Fire TV works
- A working Home Assistant instance reachable from your TV’s local network
- A few minutes to create a dedicated Home Assistant user account
- A remote with at least one button you’re willing to sacrifice for the greater good
🔌 Step 1: Install and connect the app
Section titled “🔌 Step 1: Install and connect the app”Grab QuickBars from the Google Play Store and install it on your Android TV box like any other app.
Open it up, head to Settings on the left menu, and flip on both requested system permissions. This allows QuickBars to draw overlays over other apps and intercept keypresses from your physical remote.
Next, enter your Home Assistant URL. Pro tip: explicitly add the port number (e.g., :443 or :8123) to the end of the address, just to rule network dark magic out as a source of future headaches.
For authentication, QuickBars shows you a handy QR code. Scan it with your phone, and it opens a browser window ready for a long-lived access token.
👤 Give QuickBars its own Home Assistant user
Section titled “👤 Give QuickBars its own Home Assistant user”Do not reuse your main personal Home Assistant login for this! Creating a dedicated user account for secondary devices like TVs is basic smart home security hygiene:
- Containment & Security: If an app exploit leaks your credentials, the blast radius is contained. You can instantly revoke that single TV token without needing to change your master account password.
- Clean Audit Trail: When an automation pops a camera feed onto the screen, your Home Assistant Logbook will clearly state that “QuickBars” performed the action, rather than attributing it to you.
Here is how to set it up properly:
- In Home Assistant, create a new local, active user with administrator rights. I named mine, with peak creative effort, “QuickBars.”
- Log in as that user in a browser — an incognito window works great so it doesn’t tangle with your main session.
- Go to your profile, scroll down to Security, and generate a long-lived access token at the bottom.
- Copy that token into the browser window QuickBars opened via the QR code, and hit Test Connection.
- Toggle on Persistent Background Connections so QuickBars stays linked to Home Assistant, constantly listening for live camera pop-up triggers.
Wait, Administrator Privileges for a TV App?! My security paranoia immediately kicked in when I saw this. Why on earth does a TV app need admin rights? Is it going to launch nuclear missiles from my living room? So I created a plain, non-admin user instead. Nothing in the app or docs warned me this was wrong—it just quietly refused to work. It turns out that letting Home Assistant push live camera events to your TV requires reading HA’s internal event bus, which is strictly an admin-only permission. Save yourself the hair-pulling mystery and grant it administrator privileges right from step one.
🔨 The background hammering loop that locked me out
Section titled “🔨 The background hammering loop that locked me out”Here is how my simple afternoon setup spiraled into a two-week tragicomedy.
When my non-admin user quietly failed to trigger camera overlays, I assumed my access token was bad. Naturally, I went down a chaotic loop of deleting tokens, creating new tokens, deleting users, and testing again.
What I didn’t realize was that QuickBars’ Persistent Background Connections feature behaves like a clingy ex when authentication fails. The millisecond a token was deleted, the app didn’t just give up quietly—it went into a frantic background retry loop, hammering Home Assistant with dozens of unauthorized login requests per minute.
Home Assistant has a built-in defense against brute-force attacks (ip ban). Seeing this sudden, violent flood of unauthenticated requests coming from my living room, Home Assistant mistook my Google TV box for a Russian hacker and banned its IP address outright.
This triggered an invisible feedback loop from hell:
- QuickBars failed an auth check with the old token.
- QuickBars immediately began hammering HA with rapid background retry attempts.
- HA permanently banned the TV box’s local IP address.
- I entered a shiny new token into QuickBars, but because the TV’s IP was already banned, HA slammed the door on every incoming request anyway.
- QuickBars kept retry-hammering, continuously resetting its own ban timer.
Because there was no “HEY YOU ARE BANNED” popup on the TV screen, I kept assuming my tokens were broken, generating more tokens, and dragging this out over two weeks whenever I had free time to troubleshoot.
Save yourself from my self-inflicted nightmare:
- Create the local, active user as an administrator from the start.
- Loosen Home Assistant’s login-attempt/IP-ban protection in your
httpconfig while testing tokens. - Reboot the Android TV box whenever you change tokens. That actually wipes QuickBars’ background cache and stops the aggressive hammering loop with the previous token.
👀 Step 2: Choose which entities QuickBars can see
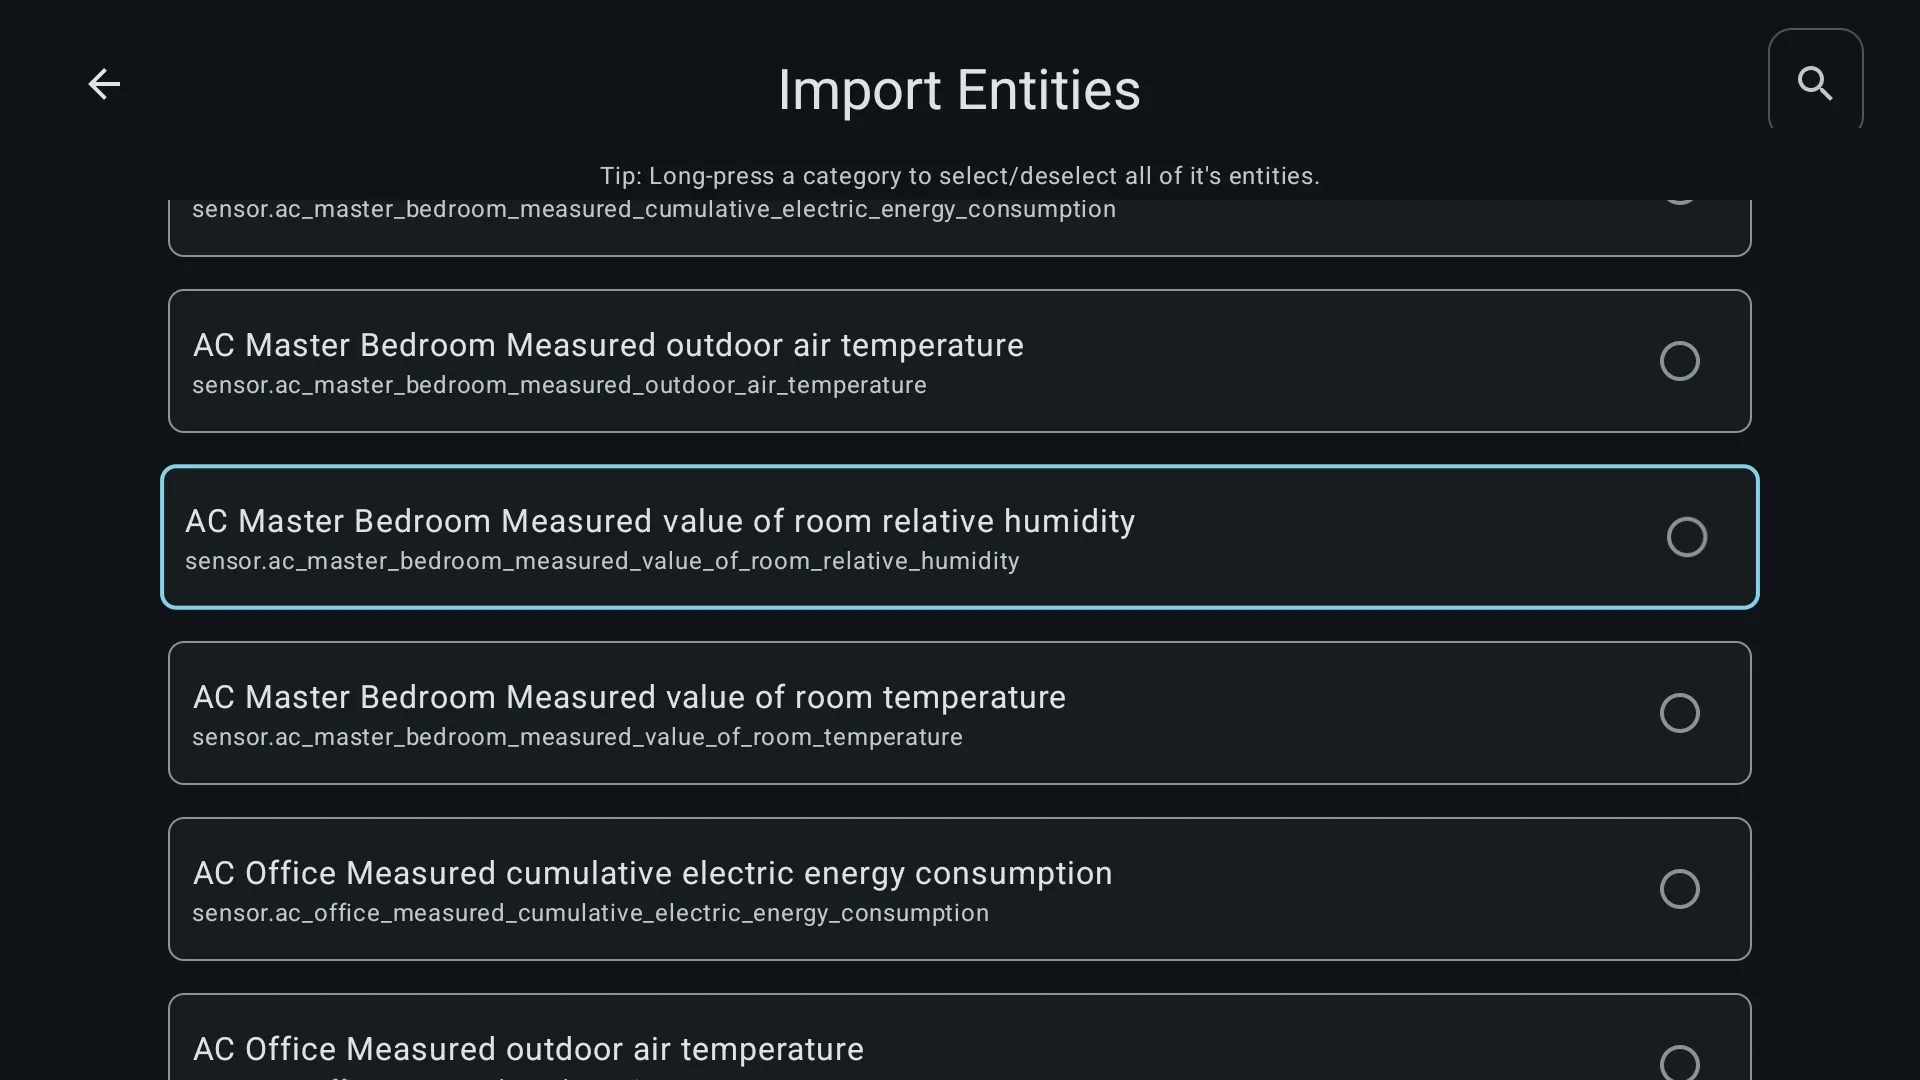
Section titled “👀 Step 2: Choose which entities QuickBars can see”Once connected, head to Entities inside the app and pick the specific devices you want QuickBars to access. It won’t grab your entire Home Assistant setup automatically—you pick and choose, which keeps your TV interface clean and fast.
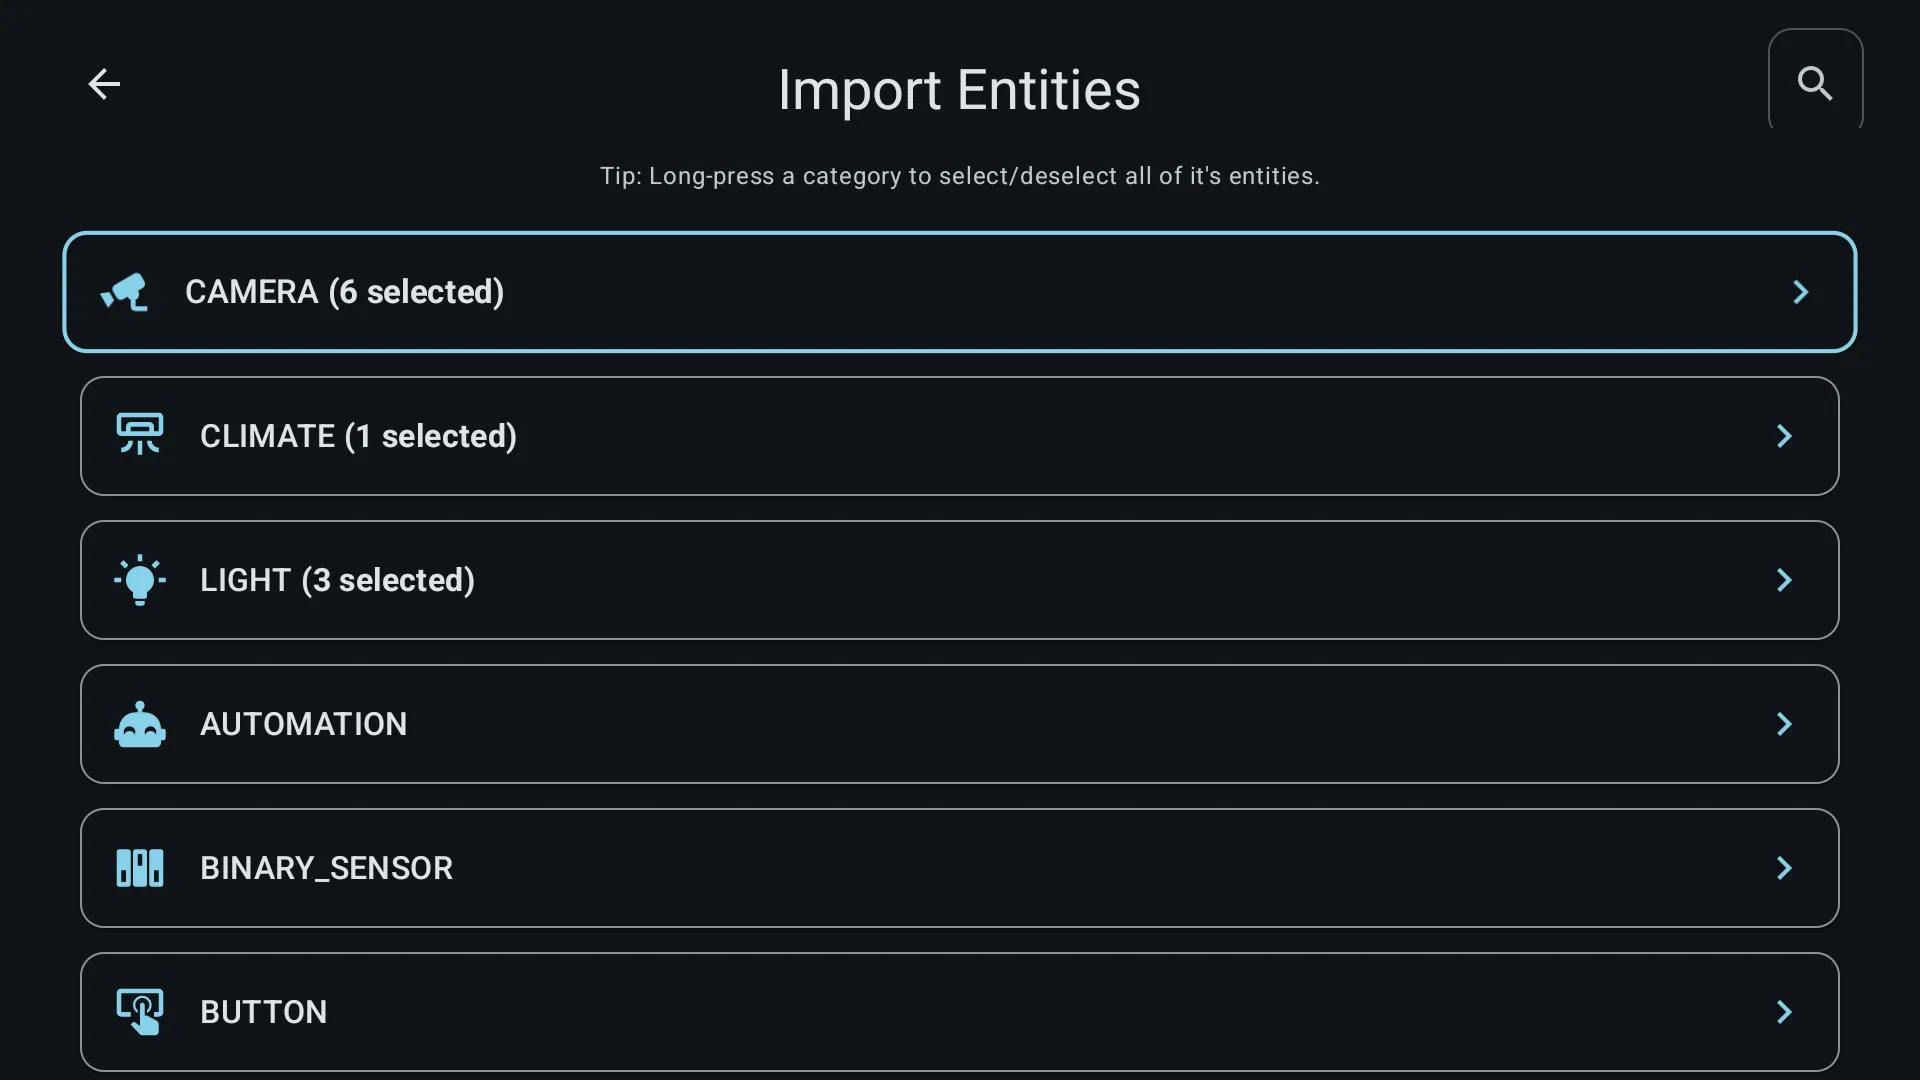
I imported a handful of cameras, plus my living room lights and air conditioner. Eyes on the places I can’t see from the couch, and lazy control over the environment right next to me.
🏎️ Step 3: Let Home Assistant Take the Wheel (Automated Cameras!)
Section titled “🏎️ Step 3: Let Home Assistant Take the Wheel (Automated Cameras!)”Now for the main event! QuickBars can listen for triggers from Home Assistant to pop video feeds onto your TV automatically—no remote touching required.
🖼️ Blueprint 1: Show a camera as picture-in-picture
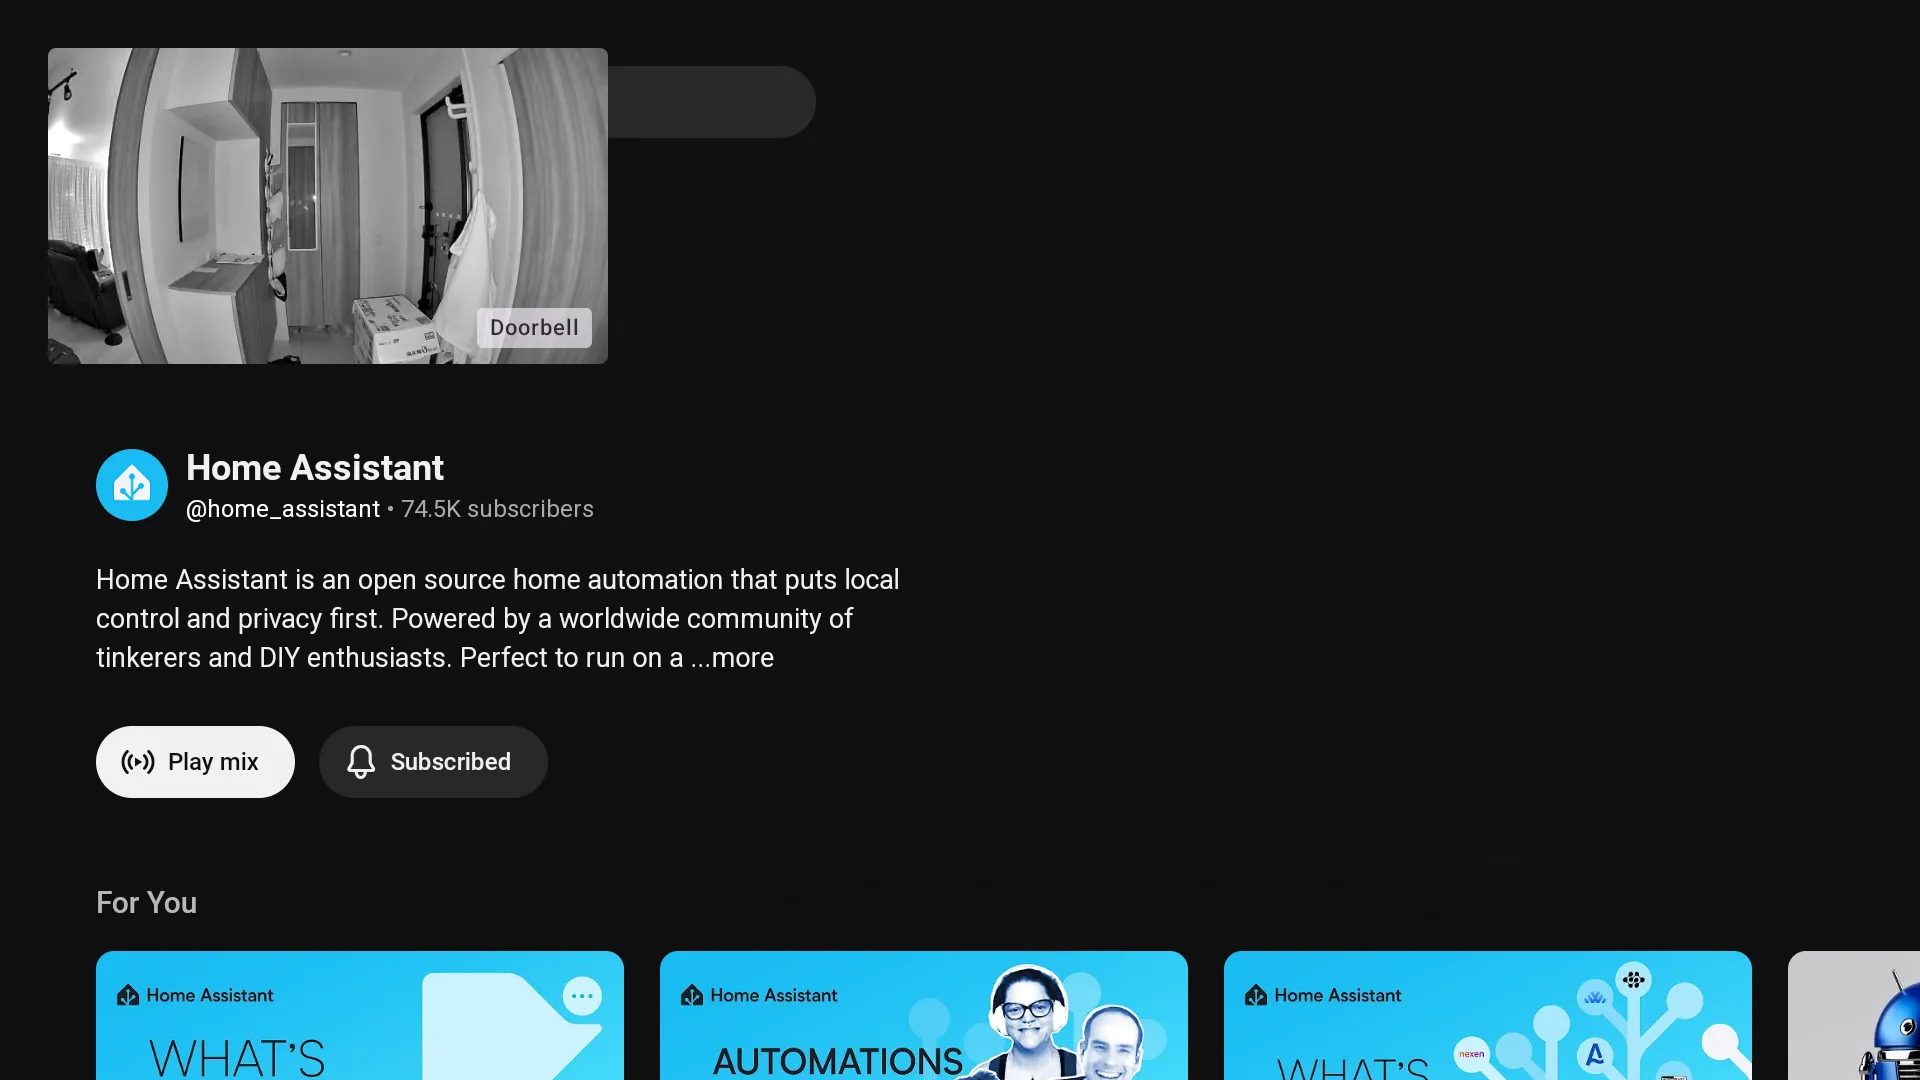
Section titled “🖼️ Blueprint 1: Show a camera as picture-in-picture”This camera blueprint creates a script that drops a live camera feed into a floating PiP window on your TV screen. Import the blueprint, create a script, and link it to a camera entity you imported into QuickBars.
Pro Tip: Always set an auto-hide duration (e.g., 45 seconds) in the blueprint. Unless you want an idle driveway feed permanently blocking the climax of a movie, give it an expiration timer.
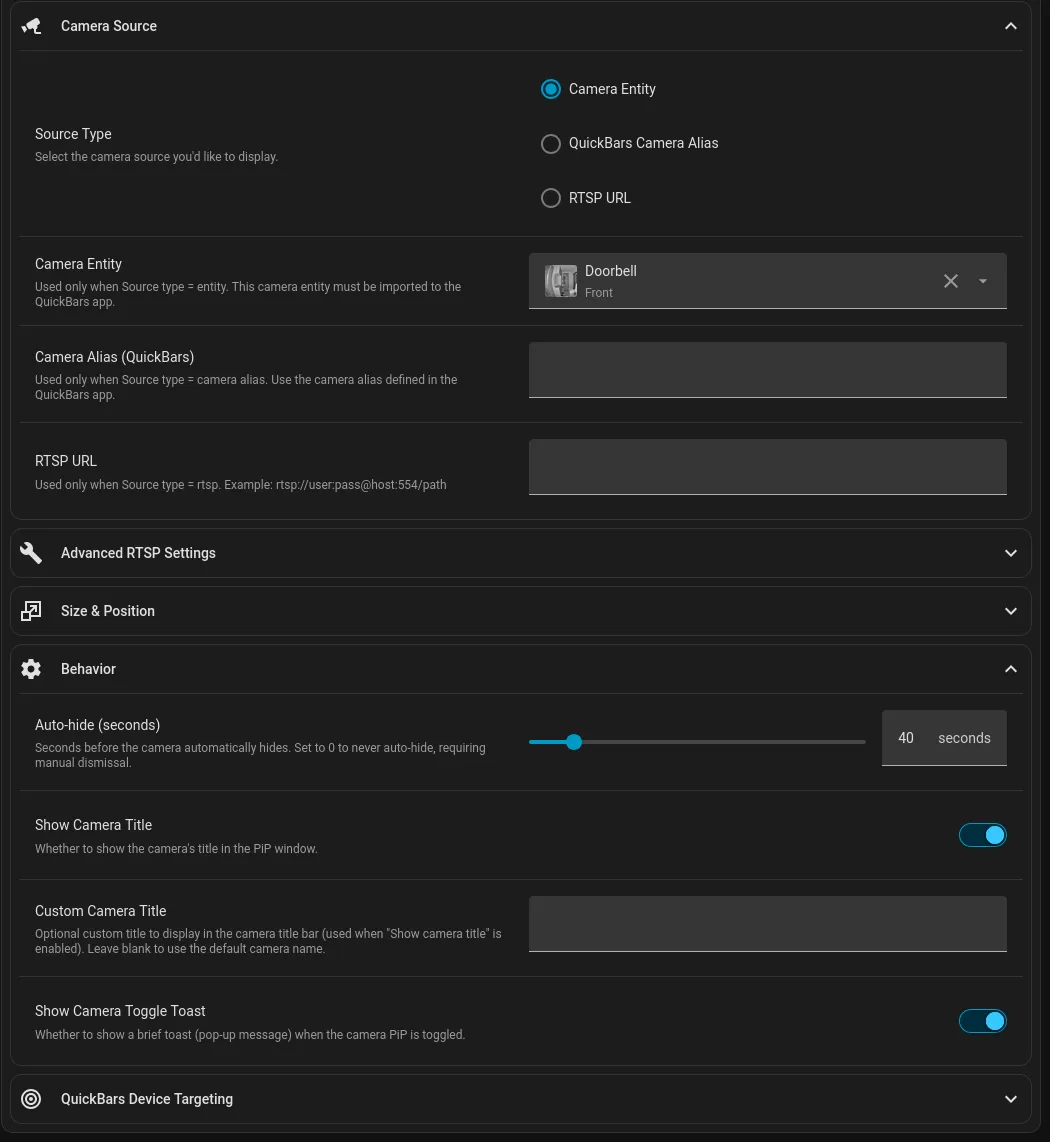
Once the script is saved, pair it with any Home Assistant automation trigger—a doorbell press, outdoor motion sensors, or a person/animal/car occupancy detector. Now your TV alerts you to outside activity automatically, exactly when it happens!
📊 Blueprint 2: Show or hide a QuickBar
Section titled “📊 Blueprint 2: Show or hide a QuickBar”There’s a second blueprint that lets Home Assistant open or close an entire on-screen control panel automatically. Check out the documentation if you have a cool automation scenario for on-screen menus! I did not.
🕹️ Step 4: Turn your remote into a smart remote (bonus feature)
Section titled “🕹️ Step 4: Turn your remote into a smart remote (bonus feature)”Under Trigger Keys, you can hijack physical remote buttons and assign custom smart home actions.
The free version limits you to configuring one trigger key, so choose wisely.
Safety Warning: Reassigning the D-pad, Power, or Back button is a fast-track ticket to making your family hate you and turning your remote into an expensive paperweight. Stick to dedicated app shortcut buttons like YouTube or Netflix.
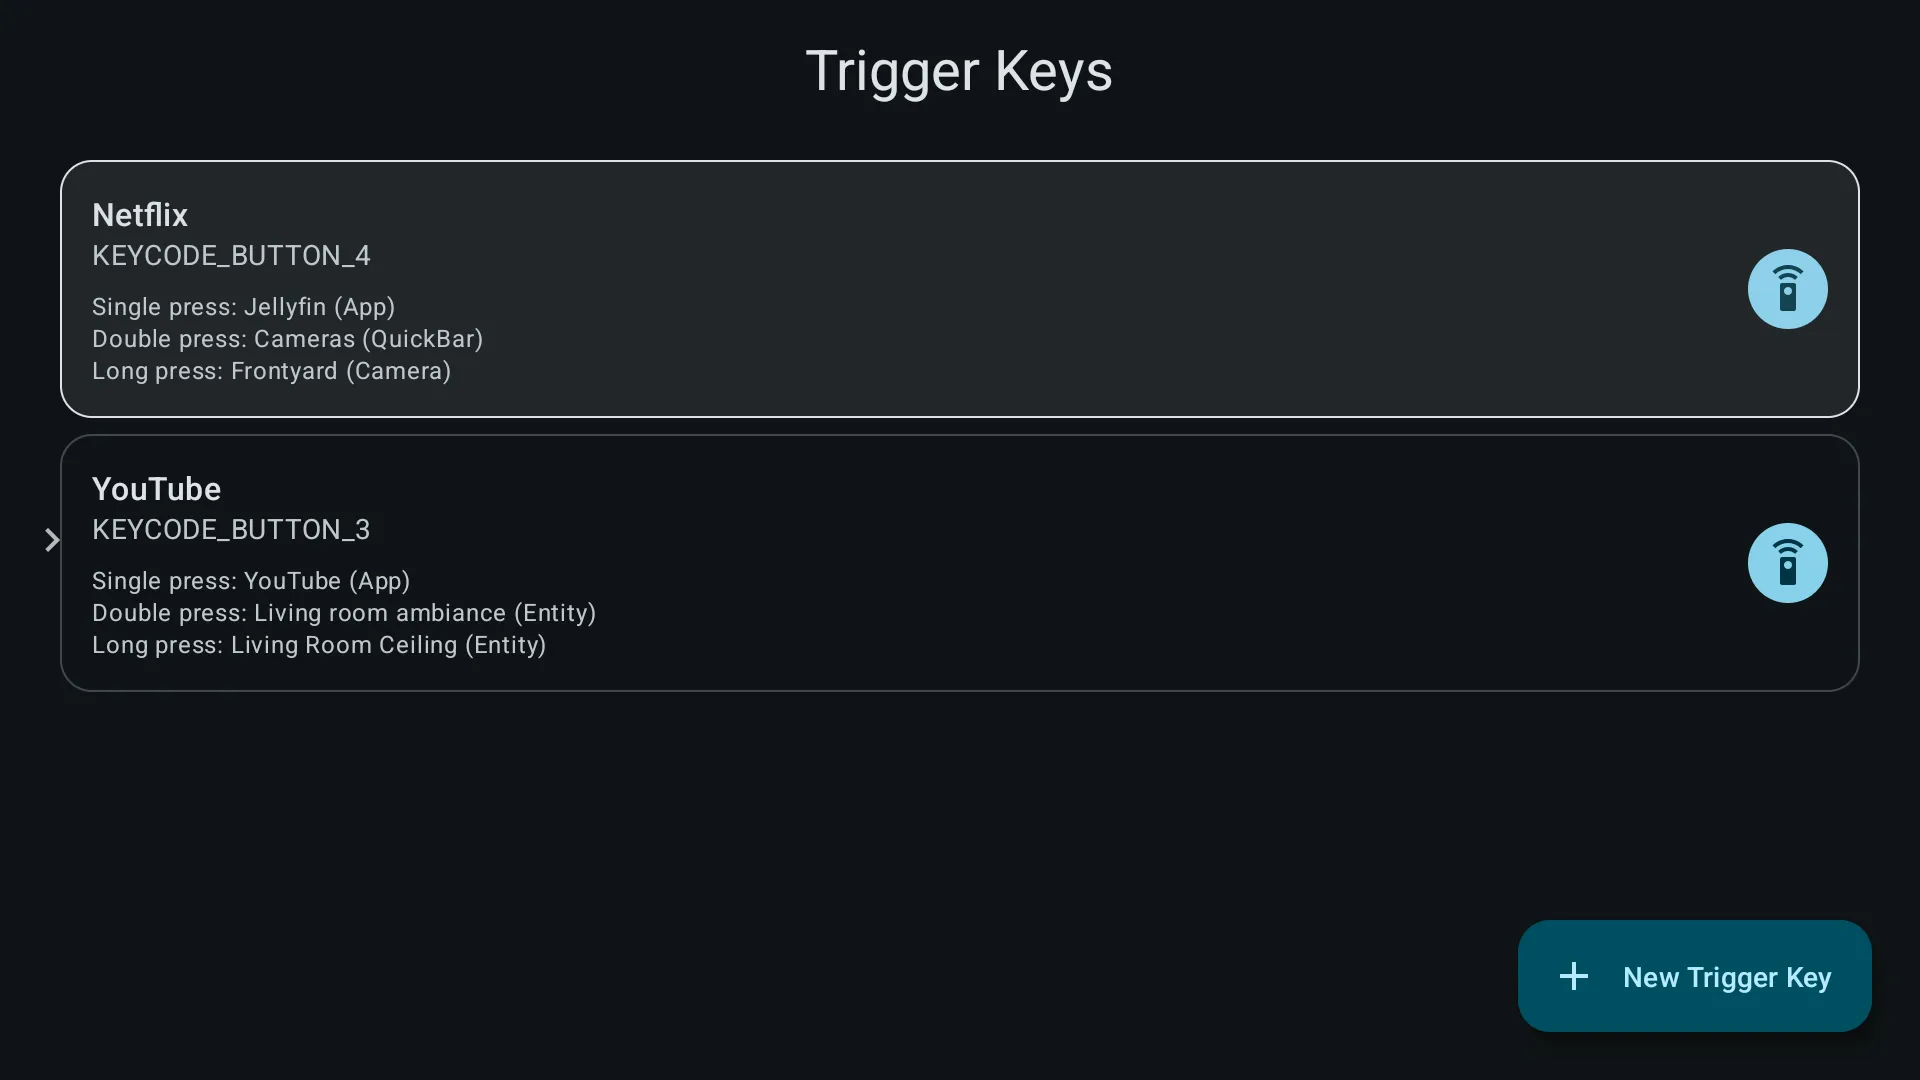
Each button gets up to three separate actions: single press, double press, and long press. You can set them to launch an app, toggle an entity on/off, summon a QuickBar, or pop up a camera feed manually. Pressing the exact same button trigger again hides the pop-up—intuitive and simple.
Here’s how I configured mine:
| Button | Single Press | Double Press | Long Press |
|---|---|---|---|
| YouTube | Opens YouTube (Default) | Toggles living room ambiance lights | Shows backyard camera |
| Netflix | Opens my preferred media app | Toggles main ceiling light | Shows front porch camera |
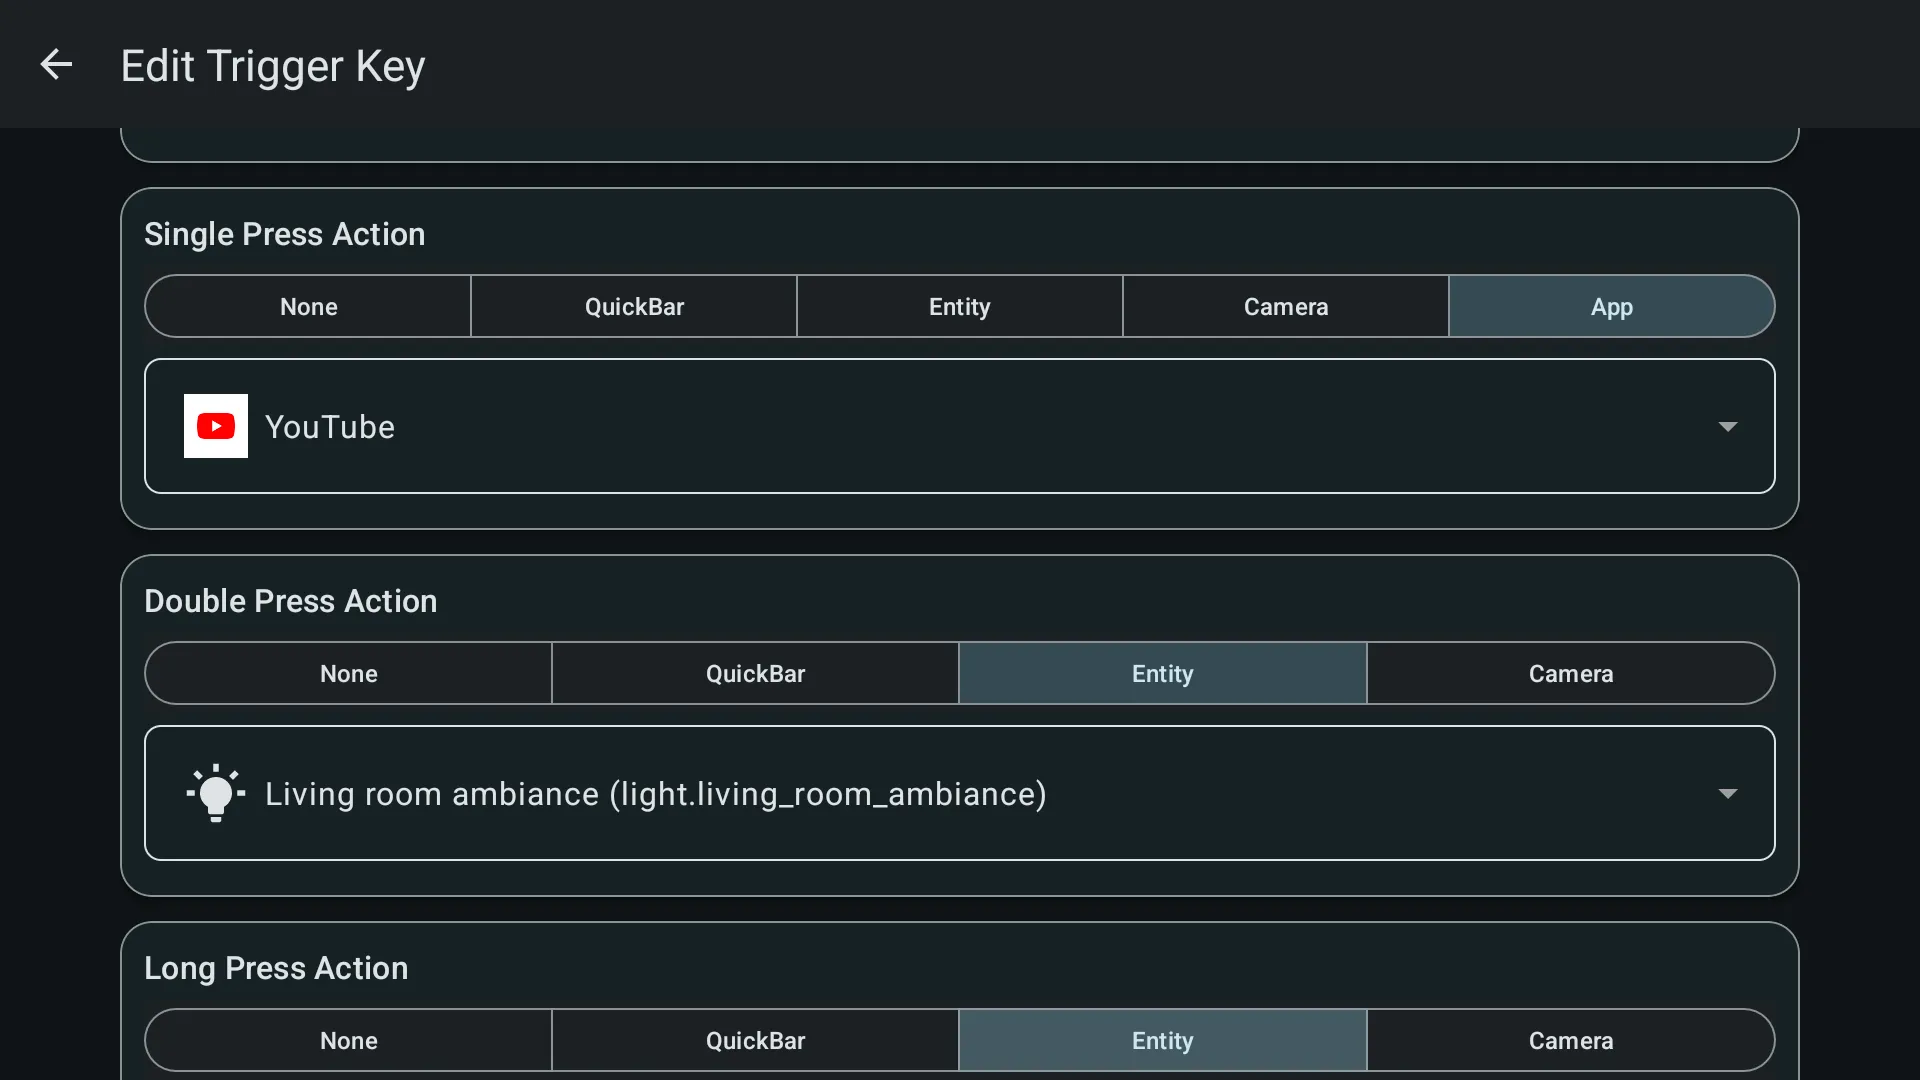
Two extra button presses on a remote I’m already holding now cover half of my daily smart home tweaks when I am in the living room!
🛠️ Step 5: Build your on-screen QuickBar
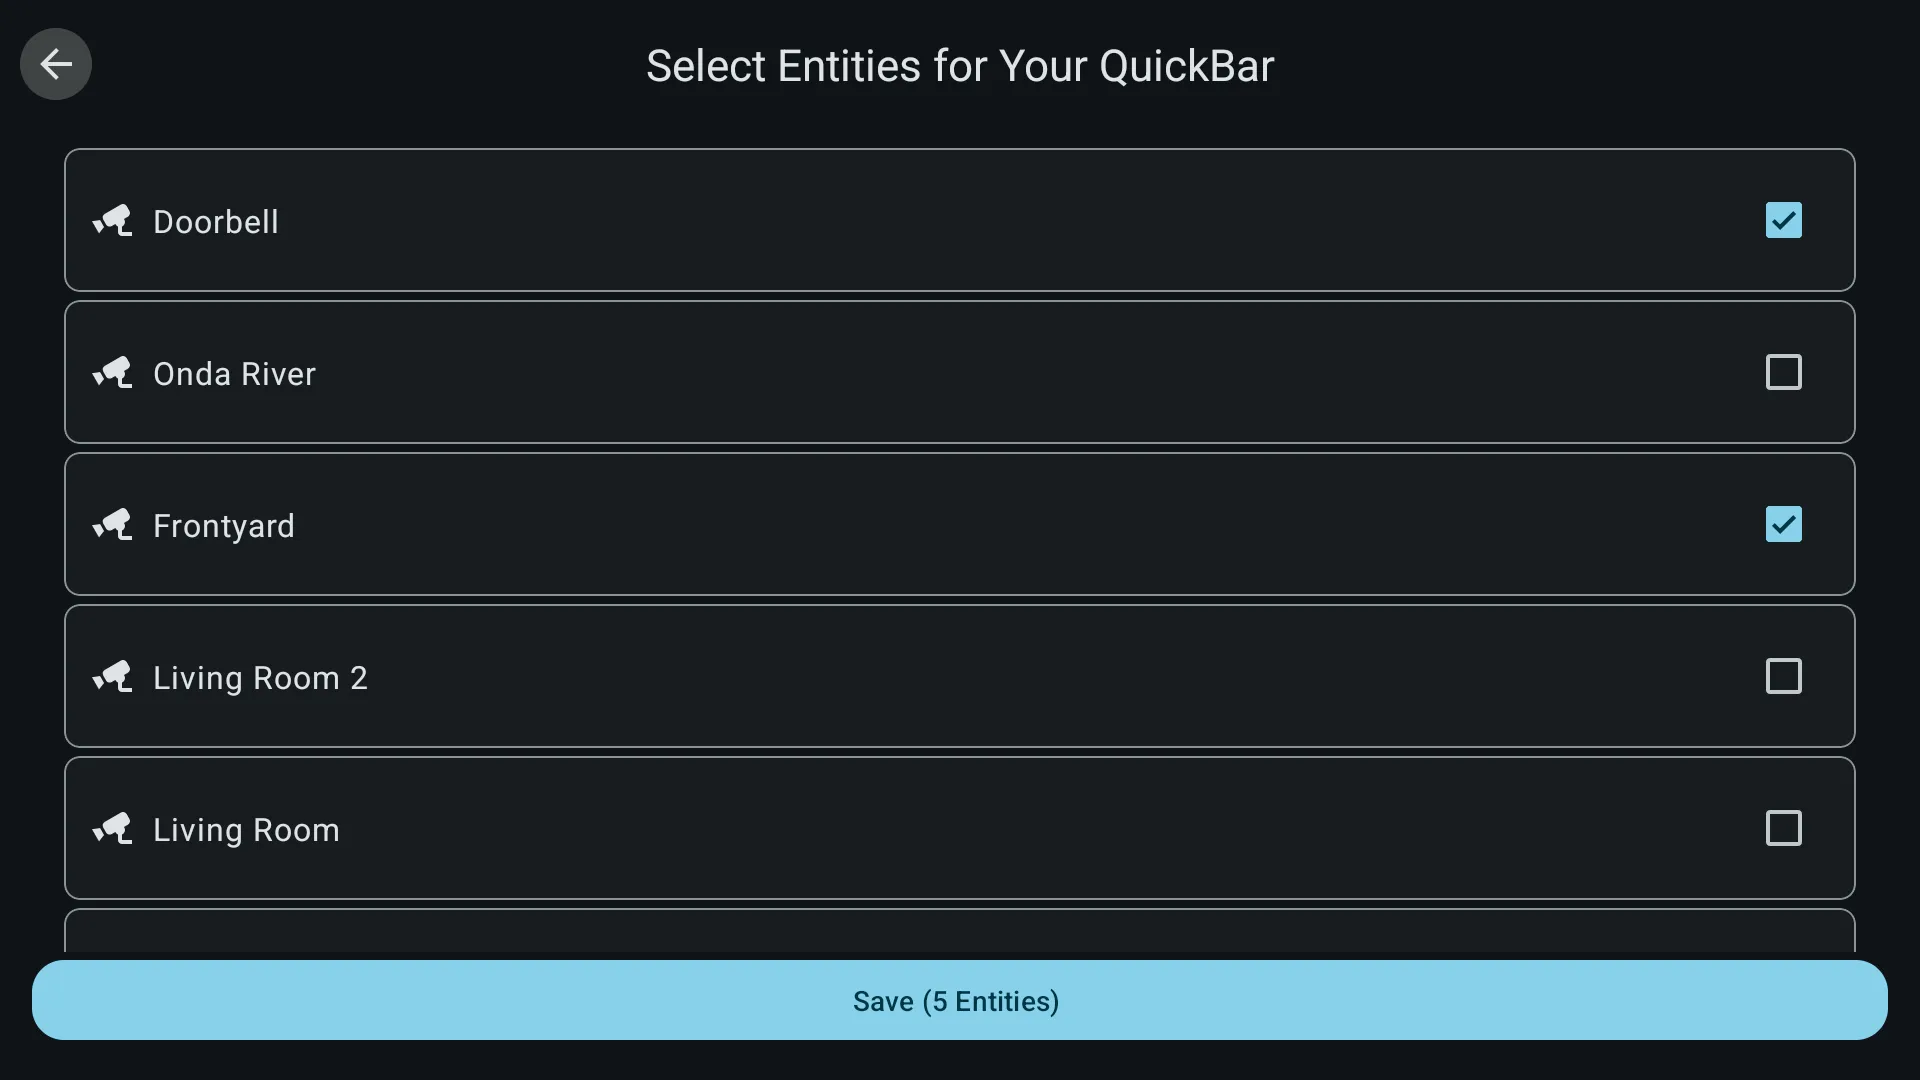
Section titled “🛠️ Step 5: Build your on-screen QuickBar”If you want a manual, on-screen menu panel, head to the “QuickBars” section in the app. Pick your imported entities, select a style, and choose where on the screen it should pop up when called.
Keep in mind:
- The free version limits you to one QuickBar panel.
- A camera button on a QuickBar doesn’t stream video inside the menu row itself—it acts as a launcher button that triggers the full camera overlay when clicked.
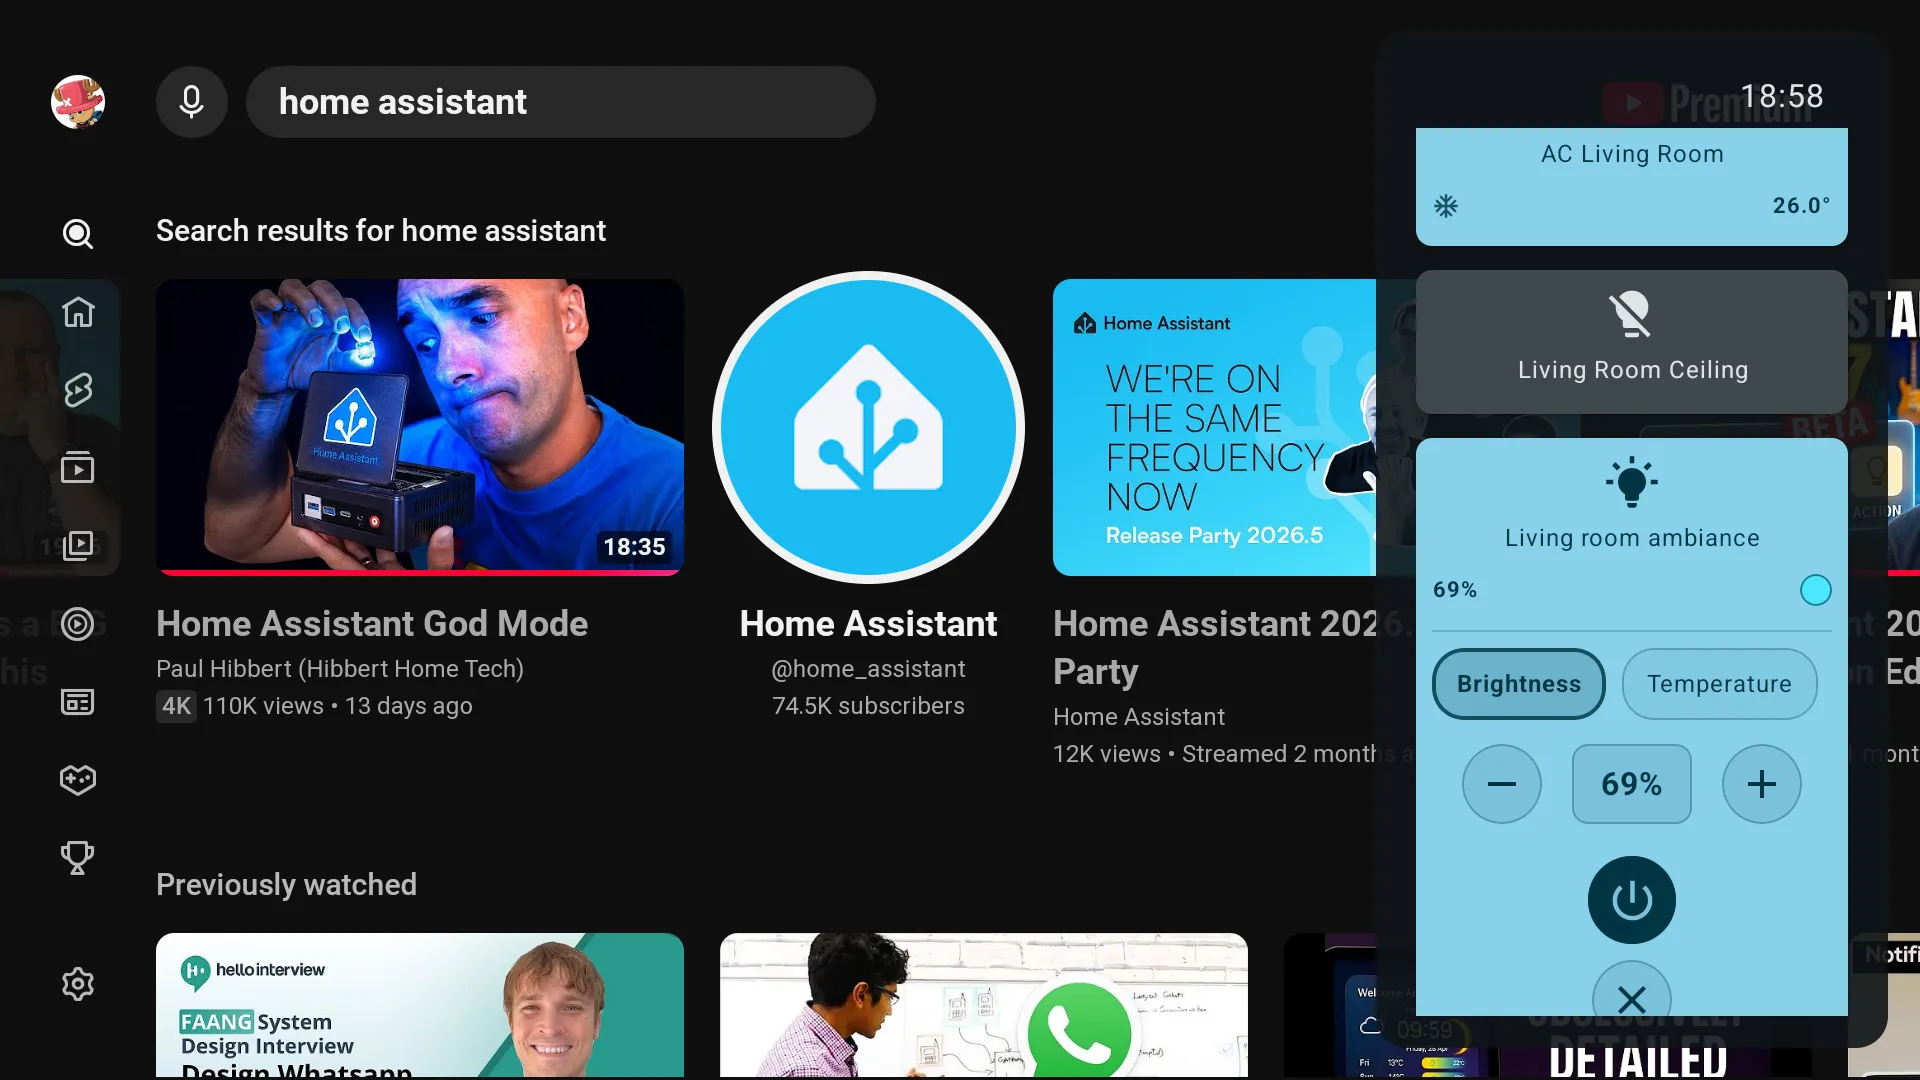
🍿 How I actually use mine
Section titled “🍿 How I actually use mine”The button remapping is genuinely handy and gets used every single day. But the true star of the show is the hands-free automation: my driveway and doorbell cameras now pop up in a slick PiP window whenever a person, car, or delivery driver arrives, while whatever show I’m watching keeps playing without missing a beat.
Two weeks of fighting Home Assistant’s IP-ban hammer and QuickBars’ aggressive retry loops turned out to be completely worth it. A free app, one undocumented admin permission requirement, and my TV now doubles as a sci-fi home monitoring station.